Black stain for interior use
Indoor wood can quickly develop stains, wear, or discoloration without a finish. With Osmo Black Oil-Stain, you give the wood a stylish black or black-wash look while also protecting it against moisture, dirt, and scratches.
Products in this knowledge item;
Which black stain is suitable for interior use?
Are you looking for black stain for indoor use? You’ve come to the right place. Black stain allows you to give wooden surfaces a fully black finish or a black-wash effect. Not only does black stain enhance the appearance of wood, it also often protects it against moisture, dirt, and damage.
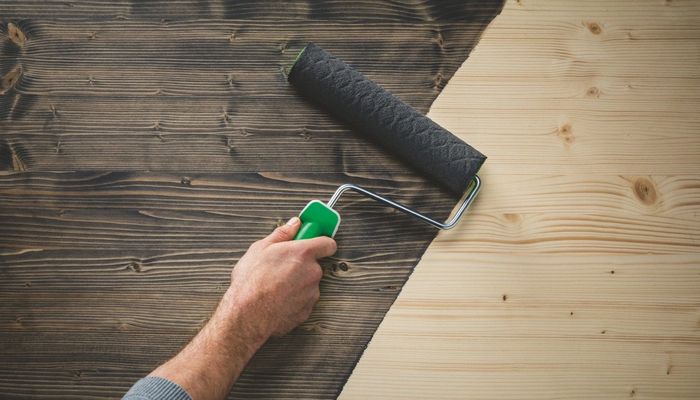
Osmo Black Oil-Stain is suitable for all types of wooden surfaces, giving them a bold and stylish black appearance. This versatile product can create both a solid or wash effect. Because Osmo Oil-Stain contains Hardwax, which hardens in the upper fibers of the wood, it creates a scratch-resistant, water- and dirt-repellent surface. Once dry, Osmo Oil-Stain is completely safe for humans, animals, and plants, making it ideal for floors, tables, children’s toys, and many other surfaces.
This page covers black exterior stain. If you are looking for black stain for indoor use, read more about our black stain for interior surfaces.
Benefits of the Black Stain
- Optimal coverage
- Long-lasting protection
- High efficiency
- Natural ingredients
What is exterior wood stain?
There are several options for enhancing and protecting exterior wood. One of the most popular products is exterior wood stain. A stain protects the wood from within and helps regulate moisture. There is a distinction between transparent and opaque stains. A transparent exterior stain usually contains little to no color pigment. An opaque stain adds pigments that give the wood a different color while simultaneously protecting it from discoloration. The darker the stain, the more pigment it contains, providing greater protection against the sun. For example, applying a black exterior stain will protect the wood for a long time from damage caused by UV radiation.
Are you looking for a colorless or transparent exterior stain? Then check out our page on transparent exterior stains.
Why choose black exterior wood stain?
First of all, you should choose black exterior stain because you like the final look it provides. An exterior stain gives wood a deep black color while, unlike paint or lacquer, leaving the wood grain visible. If you are unsure how black exterior stain will look on your fence, you can first test it on a small area to see if the appearance meets your expectations.
Black stain not only gives wood a modern and rustic look, but it also protects it—thanks to the high pigment content—against graying from the sun. In addition, the finish penetrates the wood, hardening in the upper fibers of the board. This creates a water- and dirt-repellent surface that does not peel and is easy to maintain. With regular cleaning and maintenance, the treatment can last for many years.
Products for staining wood black
Stain or paint?
For an opaque finish on exterior wood, two options are often considered: paint or stain. While both products can achieve a similar look, they are quite different. A stain— as previously explained—penetrates the wood and provides protection from within, whereas paint creates a protective layer on the surface that seals the wood. This colored film prevents moisture and dirt from penetrating the wood. Paint can also protect wood for years against moisture, dirt, and damage; however, it is much less maintenance-friendly than stain. For example, it is harder to touch up a painted area without causing color differences, and the paint layer may peel due to the wood expanding and contracting. For a long-lasting, easy-to-maintain finish, choosing a stain is therefore recommended.
What can you use black stain on?
Osmo’s Black Stain, also known as country house paint, can be used on almost any surface. Thanks to its unique, very thin formula, the black stain can even be applied to very hard wood types. If you plan to apply black stain on hardwood, make sure the wood has been weathered first. Typically, this means acclimating the wood outdoors for about six weeks, exposing it to the elements. Acclimating allows the wood fibers to open up, making it easier for the finish to penetrate. This way, the black stain soaks deeper into the wood and provides longer-lasting protection.
If the wood has partially grayed from weathering, first de-gray it using Osmo Power-Gel Wood Brightener. The Power-Gel removes dirt and graying from the wood and restores its natural color. Avoid applying black stain over grayed surfaces, as this can trap dirt and cause the wood to rot from the inside.
How can you stain wood black?
If you want to apply black stain, first test it on a small section of the wood before treating the entire surface. This allows you to check whether the stain adheres properly and whether the color matches your expectations. Once the test is successful, you can follow the full step-by-step process for the entire surface.
- Stir the black stain thoroughly to ensure the ingredients and pigments are evenly mixed.
- Apply the first layer of Osmo Black Stain with a (block) brush or floor brush on new or sanded wood. Work in thin layers.
- Correct any mistakes within 15 minutes of application, such as brush hairs or overlapping marks.
- Allow the first layer to dry for 10–12 hours before applying the second layer. Drying may take longer at temperatures other than 23°C or with higher humidity. Always ensure good ventilation. Do not apply during bad weather or rain.
- Apply the second layer of Black Stain in the same manner as the first layer. Allow this layer to dry as well (see step 4).
For an opaque effect, follow this process:
- Stir the Oil-Stain thoroughly to evenly distribute the ingredients and pigments.
- Apply the first layer with a brush or roller. Work along the full length of the surface or roll over to prevent streaks.
- Correct any mistakes within 30 minutes of application, such as roller marks or brush hairs.
- Allow the first layer to dry for at least 24 hours before applying the second layer. Drying may take longer at temperatures other than 23°C or higher humidity. Ensure good ventilation by keeping windows and doors open.
- Finish the surface with one colorless top layer, such as Hardwax-Oil Original or a colorless version of TopOil, applied with a brush or roller.
- Allow the second layer to dry; drying time for Hardwax-Oil is approximately 8–12 hours.
Frequently Asked Question
Need help with your DIY project?
Are you looking for a tutorial or do you have a technical question?
DIY help needed?
find a step-by-step guide for your project in our tutorial overview
