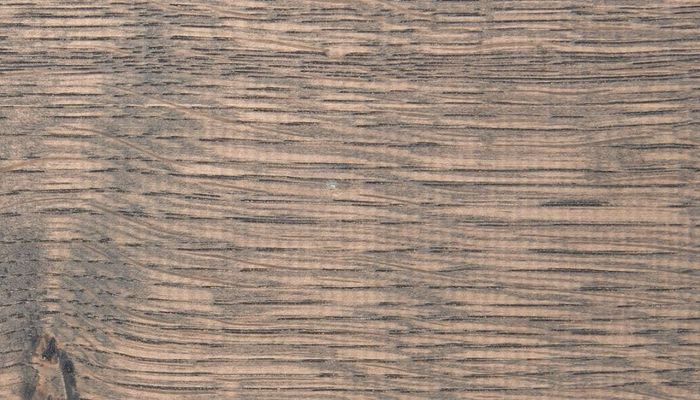
Grey wash stain
Do you want to give wood a robust grey look while protecting it against moisture and dirt? Then a grey wash is a great choice. With Osmo Olie-Beits and a colorless hardwax top layer, you can create this effect by working the product into the wood, leaving the surface well protected and easy to maintain.
Products in this knowledge item;
Give your wooden floor, kitchen, or furniture a robust grey look with Osmo Grey Wash Beits
Do you want to give your floor, kitchen, table, or other furniture a new look? Then a grey wash stain might be the right choice for you. Osmo Grey Wash Beits, also known as Osmo Olie-Beits, gives any wooden surface a robust yet subtle grey color. Osmo Grey Wash Beits is highly suitable for coloring all kinds of wooden surfaces. Not only does it add color, but it also provides the wood with an optimal protective layer that lasts for years.
Benefits of Olie-Beits
- Based on natural, plant-based oils and waxes
- High coverage, 1L = 48m² treatment
- Attractive color options, wash or opaque effect
- Can be locally repaired and easy to maintain
- Protects against moisture and dirt
Why choose a Grey wash stain?
You may be more familiar with the term “white wash,” but there are many more variations and colors within this style. One of them is the grey wash: a typical robust wood look with a vintage appearance. Oak wood is especially suitable for this look, but it can also be applied to other types of wood.
A “wash” gets its charm from the subtle haze it leaves on wooden surfaces. This effect is created by working a small amount of oil, wax, or stain into the wood.
Grey wash paint colors
Does a grey wash stain protect the surface?
No matter which Osmo product you use, you are always assured of optimal protection. The grey wash stain also contains the unique oil and wax combination that ensures your wood is optimally protected against moisture, dirt, and damage. However, we do recommend applying a colourless hardwax oil topcoat on top of the grey wash layer. This layer will ensure that the surface is protected for a long time and is easier to maintain in the future.
How do you create a grey wash effect?
The secret to a grey wash effect lies not in the product, but in the application method. While many people often use a brush or roller when painting, a polishing cloth or pad is used for a grey wash. This allows the wood to absorb a small amount of product, creating light coverage. Due to the low amount of product, the wood's structure remains visible and the grain is accentuated. Polishing the product into the wood is not a particularly difficult task, but it is a very physically demanding one. Therefore, when polishing a large surface, it is advisable to use a polishing machine.
Apply grey wash stain
As mentioned earlier, applying grey wash stain is not a particularly difficult task, but you do need to ensure you stay focused. To help you get started, we are happy to provide a step-by-step plan for applying grey wash stain.
Before you begin staining the wood, you need to prepare it. Ensure that you remove any existing paint, varnish, or stain layer by sanding the wood. Start with coarse-grit sandpaper and finish with fine-grit. This ensures a smooth surface to which the grey wash stain can adhere well. Is the wood new or untreated? Then it does not need to be sanded or degreased. The product can then be applied directly.
- Stir the product thoroughly for 2 minutes. This ensures that the product's components are well mixed. You can use the stirring stick included with the product for this.
- Buff the product into the wood using the white pad or a lint-free cloth. Ensure that you apply a thin layer and buff the product well into the wood. Mistakes made during application can be corrected up to 30 minutes after application.
- Allow the first layer to dry for at least 12 hours. Ensure that you ventilate the room well by opening windows and doors wide. The grey wash stain needs to dry through oxidation.
- Once the base coat is completely dry, you can begin applying the top coat. The top coat will contain two layers of colorless treatment to protect the surface as effectively as possible. For this, use Osmo Hardwax-Olie Original. It is best to use a brush or roller to apply the top coat. Apply a thin layer of the product, then let it dry for at least 12 hours and ensure the room is well ventilated.
- Once the first layer is completely dry, you can apply the second layer of Hardwax-Olie. Allow this layer to dry thoroughly as well. When the surface is completely dry, it is ready for intensive use.
Still looking for a different look?
Need help with your DIY project?
Are you looking for a tutorial or do you have a technical question?
DIY help needed?
find a step-by-step guide for your project in our tutorial overview
