Removing green deposits from concrete tiles
Green deposits on concrete tiles detract from their appearance. Read how to clean concrete tiles without damage.
What you need for this tutorial;
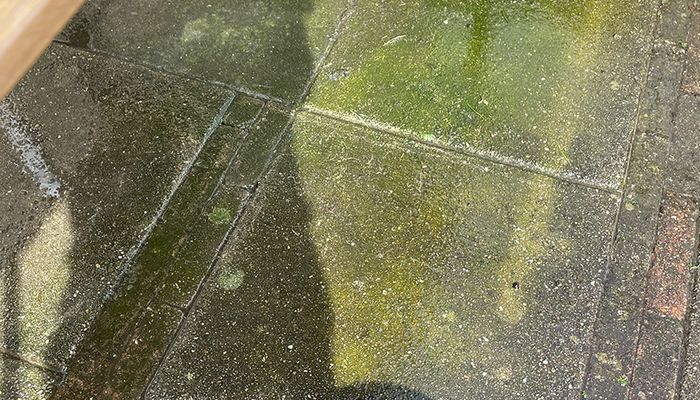
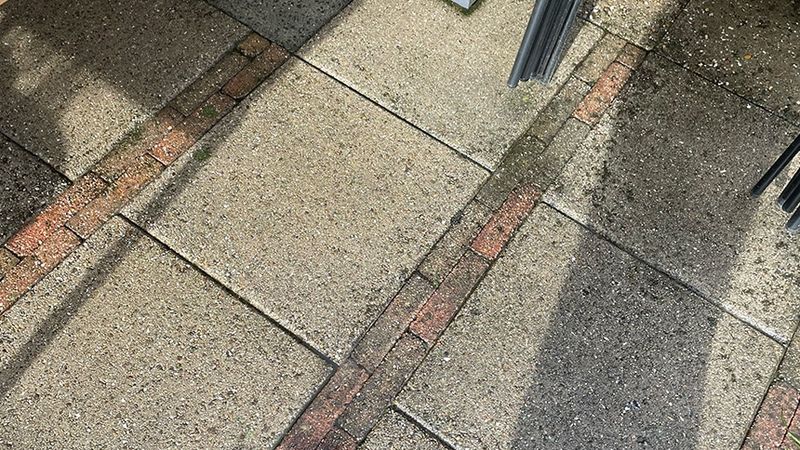
Green algae on concrete tiles is an annoying problem that mainly occurs in damp and shady areas. It not only makes your concrete tiles slippery but also less attractive. Fortunately, with the right products and approach, you can effectively remove and prevent green algae. In this article, we explain step by step how to get your concrete tiles sparkling clean again with the Osmo Patio Cleaner.
This is how green deposits form
Mainly caused by algae and moss growing in damp, shady spots. This occurs especially during dark days in autumn and winter, when precipitation and moisture have the chance to accumulate.
Tip: With an eco-friendly cleaning agent, such as Osmo Patio Cleaner, you can remove deposits without harming your tiles or the surroundings.
Step-by-step plan: removing green deposits from concrete tiles
You can clean your concrete tiles quickly and effectively with the following steps:
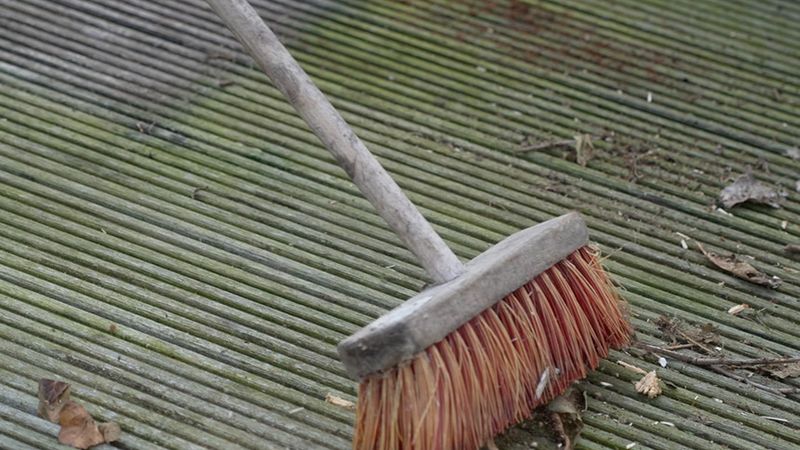
Prepare
- Start by sweeping the tiles with a stiff broom. Remove dirt, leaves, and other loose material.
- Check that your paving has adequate drainage to prevent water from pooling, which promotes the growth of algae and moss.
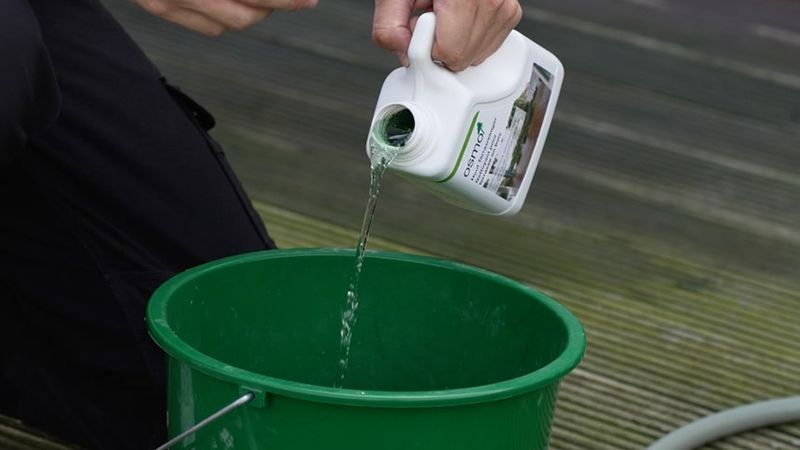
Mix the Osmo Patio Cleaner
Mix the Osmo Patio Cleaner with water.
Use a ratio of 1:25 for light soiling. For stubborn stains and dirt, use the Osmo Patio Cleaner 1:1. Make sure to stir the mixture well before using it to clean the surface.
Applying the Osmo Patio Cleaner
Apply the combination to the tiles using an Osmo Patio Brush or a brush with a telescopic handle. This allows you to clean easily without bending down.
Work in even strips and ensure the product is distributed everywhere.
Work in
- Allow the Osmo Terraseiniger to work for 10-15 minutes. This allows time to loosen dirt and deposits.
- Avoid using a high-pressure washer, as this can damage the top layer of the tiles.
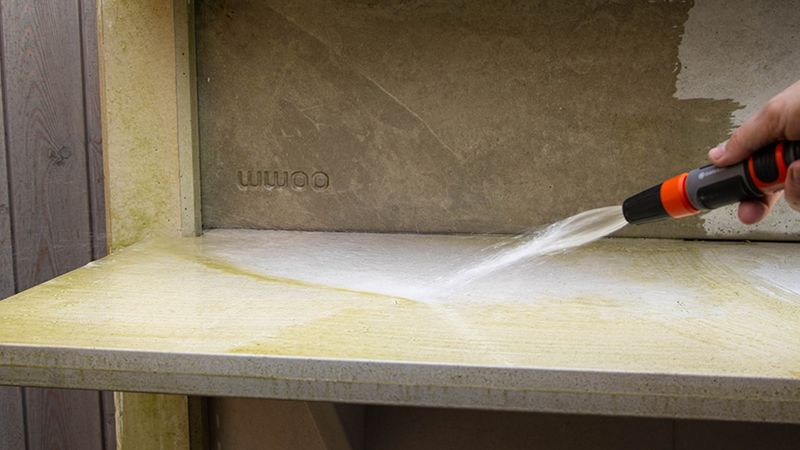
Rinse
- Rinse thoroughly with water and a garden hose.
- Repeat the process if necessary for stubborn deposits.
Benefits of the Osmo Patio Cleaner
he Osmo Patio Cleaner is specially developed for cleaning patios and offers unique benefits:
- Environmentally friendly: Safe for plants and the environment.
- Deep-acting: Removes stubborn deposits thoroughly and quickly.
- High yield: With 1 liter, you can clean 30 to 100 m².
- Easy to use: Suitable for various types of brushes and surfaces.
Supplies
Follow-up treatment
After cleaning your concrete tiles, you can choose to provide them with extra protection against dirt and moisture. Use Osmo Stone and Terracotta Oil for this purpose. This oil makes the surface dirt- and water-repellent, preventing stains from returning as quickly. Apply the oil once the tiles are completely dry and enjoy a long-lasting clean result.
Preventing green algae on concrete tiles
1. Ensure sufficient sunlight: mold grows best in shady spots. If possible, place paving in areas where the sun reaches well. This helps damp surfaces dry faster.
2. Regular maintenance: keep your patio tiles clean by regularly removing dirt, leaves, and sand. This prevents moisture from accumulating on the tiles for extended periods, which promotes moss growth.
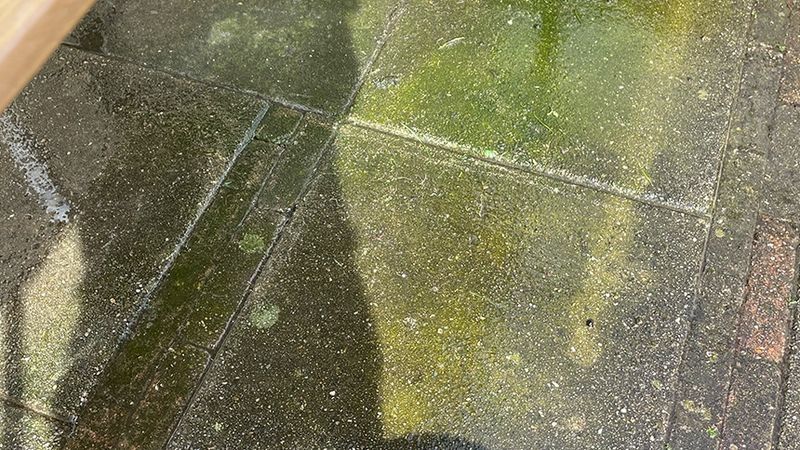
Appearance after treatment
The Osmo Patio Cleaner does not affect the color of the concrete tiles, leaving your patio looking natural and fresh after cleaning. Do you want to protect your tiles after cleaning and add a slight color enhancement? Then use the Osmo Stone and Terracotta Oil for a subtle wet look and long-lasting protection.
Maintenance advice
For concrete tiles that stay clean, we recommend:
- Cleaning twice a year: Clean your tiles in the spring and autumn to remove deposits.
- Removing dirt regularly: Leaves and sand, for example, give algae the opportunity to grow faster.
- Checking drainage: Ensure that rainwater can drain away quickly.
Frequently asked questions
This tutorial belongs to
What you need for this tutorial;
Need help with your DIY project?
Are you looking for a tutorial or do you have a technical question?
DIY help needed?
find a step-by-step guide for your project in our tutorial overview
