Painting wooden fascia boards
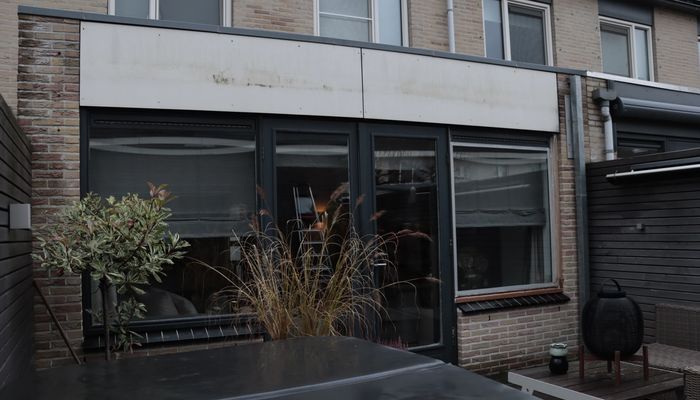
Painting your fascia boards is important, both for the look and for protection. A fresh coat of paint can work wonders for the appearance of your home or building and at the same time extend the life of the wooden parts. In this article, we give you a step-by-step guide to painting your wooden fascia boards.
What you need for this tutorial;
Painting your fascia boards is important, both for the look and for protection. A fresh coat of paint can work wonders for the appearance of your home or building and at the same time extend the life of the wooden parts. In this article, we give you a step-by-step guide to painting your wooden fascia boards.
Why paint your fascia boards?
Fascia boards are exposed to the elements every day, which makes them vulnerable to weather influences such as rain, sunlight, wind and changes in temperature. Without a protective coat of paint, these influences can damage the fascia boards. The wood can warp, crack or even rot. A properly applied coat of paint shields the wood against these influences, helps keep moisture out and prevents damage from UV radiation. Painting the fascia boards also has aesthetic benefits: a coat of paint makes the wood look fresh and well kept, which adds to the overall appearance of your home or building.
First, watch the video below for handy tips and a step-by-step plan.
Video

Boeidelen schilderen: hoe verf ik boeidelen?
Step-by-step plan: painting wooden fascia boards
Ready to tackle your fascia boards? We are happy to get you started with a step-by-step plan.
Stir well
Stir the can of Landhuisverf well with the stirring stick for about a minute. This distributes the ingredients and pigments evenly through the product.
Start with the edges
Start by painting the edges of the fascia board. Use the brush for this. Apply a thin coat and work in the direction of the wood grain as much as possible.
Paint the surface
Fill in the large surface with the roller on a roller handle. Apply a thin coat and work along the full length of the surface as much as possible, in the direction of the wood grain.
Roll it out well
Roll over the surface again with an almost dry roller, using light pressure. Make sure the product is spread evenly and any lap marks from the roller are removed.
Let it dry well
Let the fascia board dry for at least 12 hours (at 23 °C / 73 °F and 50% relative humidity). Drying takes longer at lower temperatures or higher humidity. Always make sure there is good ventilation, and do not apply the paint in bad weather or rain.
Apply a second coat
Apply a second coat for a better result.
Preparing the fascia boards
Hold on before you pick up a brush: the fascia boards may need some preparation first. Working with new wood? Then you can usually get started right away. Are the fascia boards very dirty or grayed? Then we recommend removing the graying first. This is easy to do with Osmo Power-Gel Houtontgrijzer. Is there still an old layer of varnish, paint or stain on the fascia boards? Then you will have to sand the wood first to remove it. To get the fascia boards back to bare wood and prepare them properly for a new coat of paint, sand in three passes: start with 40 grit, continue with 80 grit and finish with 120 grit sandpaper. After that, the fascia boards should be completely bare. After sanding, make the fascia boards dust-free with a brush or a slightly damp cloth.
Make sure the fascia boards are completely dry before you paint them. Has it rained? Then it is wise to wait 24 hours first. Preferably do not work in direct sunlight: strong sun can make the paint dry too quickly, which can lead to an uneven finish. Tape off any parts that must stay free of paint, such as a wall or a gutter.
Supplies for painting fascia boards
Choose the right paint
Although many people choose to paint their wooden fascia boards for the look, it is important that the paint also does its protective job. The choice of paint is crucial here. Regular paints, such as latex-based or solvent-based paints, do give a colored protective layer, but over time this layer can start to crack or peel. Since your fascia boards are exposed to changes in moisture, UV radiation and temperature every day, you will undoubtedly want a more durable solution.
That is why it is better to use an oil-based paint, such as Osmo Landhuisverf. This paint not only gives optimal color coverage, it also penetrates deep into the wood, protecting it from within against moisture, dirt and damage. The structure of the wood remains visible under the color. The result: colorfast fascia boards that keep their natural character and can withstand the changeable Dutch climate.
Maintaining your wooden fascia boards
Now that the fascia boards look beautiful again, you naturally want to keep them that way for as long as possible. To keep exterior wood looking good for as long as possible, proper maintenance is important. Clean the wood thoroughly at least twice a year. For a really thorough clean, use Osmo Terrasreiniger: a powerful cleaner that does not harm the wood and removes dirt from the finish.
Does the wood need a fresh coat after a while? Because Osmo Landhuisverf does not peel or crack, you can easily apply a new coat of the same color after cleaning. From now on, you never need to sand again!
This tutorial belongs to
What you need for this tutorial;
We're happy to help
Looking for DIY advice or have a technical question?