How should I stain my fence?
This page explains why staining a fence is important and how it protects the wood against UV radiation, moisture and temperature fluctuations. The guide also contains a complete step-by-step plan covering preparation, choosing a product, application and maintenance for a beautiful, long-lasting result.

What you need for this tutorial;
Staining your fence is a very wise choice. While your garden fence determines the look of your outdoor space, it also has to endure the weather. Discover how staining adds both beauty and lifespan to your fence. In this step-by-step guide, we explain how to stain your fence.
Why staining your fence is important
Your wooden fence largely determines the look of your garden, so you want to keep it looking good for as long as possible. A surface that is constantly exposed to the elements needs to be well protected. By staining your fence, you give it a protective layer that shields the wood from UV radiation. Stain also helps keep moisture out, which helps protect the wood against rot. A well-stained fence is also less affected by temperature fluctuations, which reduces shrinking and swelling of the wood. In short, staining makes sure your fence lasts longer, keeps doing its job and looks good at the same time.
Watch the video below and discover practical tips and a handy step-by-step plan.

SCHUTTING BEITSEN: Hoe Beits Ik Een Schutting? | Osmo Nederland
Supplies for staining a fence
Before you start: supplies and preparation
Preparing a fence
Hold on a moment before you pick up a brush. Before you can start, the fence may need some preparation first. Is the fence new? Then you can usually get started right away. Has the fence turned gray? Then it is best to remove the graying first. You can do this with Osmo Power-Gel Houtontgrijzer. Is there still an old layer of paint, stain or varnish on the fence? Then you will first have to remove it with a sander. For a bare, even base, sand in three passes: first with 40 grit sandpaper, then with 80 grit and finally with 120 grit. After sanding, make the fence completely dust-free with a brush or wipe it with a slightly damp cloth.
Before you can start staining, the fence must be completely dry. After rain, it is best to wait 24 hours. Preferably do not work in direct sunlight: bright sun can make the stain dry too quickly, resulting in an uneven appearance.
Staining a fence: step-by-step instructions
Ready to tackle your fence? We are happy to help you on your way with a step-by-step plan.
Stir
Stir the can of Natuurlijke Olie-Beits well with the stirring stick for about a minute. This distributes the ingredients and pigments evenly through the product.
Edges
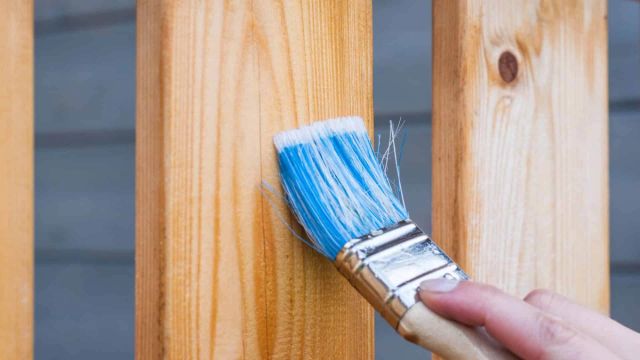
Start with the edges on the sides of the fence and between the boards, using the brush. Work in thin coats, following the direction of the boards and covering the full length of the surface as much as possible.
First coat
Then apply Natuurlijke Olie-Beits to the large surface with the brush.
Brush out
Brush out the fence thoroughly with an almost dry block brush. Make sure any lap marks from the block brush are removed.
Drying
Let the fence dry for at least 6 hours. At lower temperatures or higher humidity, drying takes longer. Always make sure there is good ventilation, and do not apply the stain in bad weather or rain.
Second coat
Apply a second coat (see steps 2 to 5). The second coat dries in about 12 hours.
Choose the right stain
Choosing the right stain is essential for your fence. Not every stain is the same: composition, quality and protection can differ from one stain to another. A good quality stain protects the fence against factors such as UV radiation, temperature fluctuations and moisture, while accentuating the natural texture of the wood.
For your fence, we recommend Osmo Natuurlijke Olie-Beits. Made from natural oils and waxes, this stain penetrates deep into the wood. This provides thorough protection that goes beyond the surface and protects the wood from within against dirt, moisture and other damage. What makes Osmo Natuurlijke Olie-Beits unique is that it also nourishes the wood, which helps it stay flexible and reduces the risk of cracking or splitting.
Maintaining your fence after staining
Cleaning and maintaining the fence regularly can extend its lifespan considerably. To clean the fence, you can use Osmo Terrasreiniger. Mix this natural cleaner with water in a ratio of 1:25, or 1:1 for heavy soiling. If the fence starts to look dry and needs a fresh coat, you can apply a new thin coat of the stain after cleaning. Sanding beforehand is not necessary.
This tutorial belongs to
What you need for this tutorial;
We're happy to help
Looking for DIY advice or have a technical question?