Painting a wooden cabinet
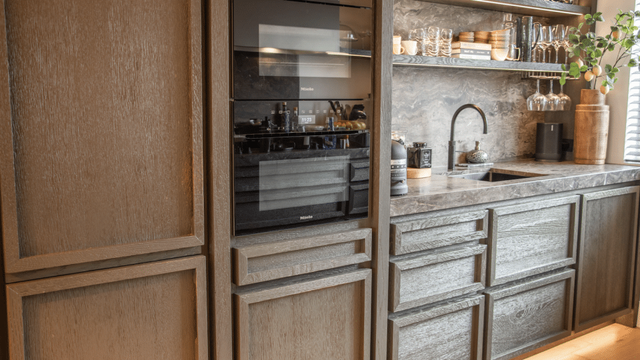
Want to give your wooden cabinet a second life? A coat of paint works wonders! In this article, you will learn how to paint a wooden cabinet step by step, which materials you need and how to get the best result. Turn your old cabinet into a stylish piece of furniture.
What you need for this tutorial;
Painting a wooden cabinet
KAST SCHILDEREN
Why paint your wooden cabinet?
Painting your cabinet has several benefits. First of all, a fresh coat of paint can breathe new life into your old cabinet, giving your interior a fresh update without having to buy new furniture. A coat of paint also protects the wood against wear, scratches, stains and moisture, which extends the life of your cabinet. By experimenting with colors and finishes, you can make your cabinet blend seamlessly with your personal style and interior.
Choose the right paint
Refreshing the look of your wooden cabinet is probably the main reason for this painting project. But wouldn't it be ideal if that makeover also gave extra protection? The choice of paint matters more here than you might think. A standard paint, such as a solvent-based or latex paint, does apply a protective colored layer to the wood, but over time it can crack or peel due to wear. Repainting the cabinet will then soon be back on the agenda.
A better choice is an oil-based paint, such as Osmo Decorwas Creativ. This paint not only gives optimal color coverage, it also penetrates the wood and bonds with it. This protects the wood from within against moisture, dirt and damage. Thanks to this bond, the color layer does not crack or peel, and the wood grain and structure remain visible. Consider applying a colorless TopOil as the final coat. This makes it easy to maintain the cabinet in the future without creating color differences.
Preparing a cabinet
Good preparation is essential for a good end result. Before you pick up the paintbrush, the cabinet may need some preparation. Make sure the cabinet is clean and bare before you start painting. With a new or untreated cabinet, you can usually get started right away. Does the cabinet have a lot of stains or scratches, or does it still have an old layer of varnish or paint? Then you will have to remove this first by sanding. For an optimally bare and even surface to which the paint can adhere well, we recommend sanding in three passes. Start with 40 grit, continue with 80 grit and finish with 120 grit sandpaper. Do not forget to wear the necessary safety equipment while sanding, such as gloves, a dust mask and safety glasses. After sanding, use Osmo Easy Pad Polishing Cloths to make the cabinet dust-free.
Remove any door knobs or detachable legs. Take out the drawers so you can paint them separately. Are there parts you cannot remove? Then it is handy to tape them off.
Supplies
Step-by-step plan: painting a wooden cabinet
Ready to give your cabinet a makeover? We are happy to get you started with a step-by-step plan.
Stir the can well
Stir the can of Decorwas Creativ well with the stirring stick for about a minute. This distributes the ingredients and pigments evenly through the product.
Start with the edges
Start by painting the edges and details. Use a brush for this. Apply a thin coat and work in the direction of the wood grain as much as possible.
Paint the large surfaces
Apply a thin coat of Decorwas Creativ to the large surfaces with a roller on a roller handle. Work in the direction of the wood grain as much as possible.
Roll it out well
Roll over large surfaces again with an almost dry roller, using light pressure. This spreads the product evenly and removes any lap marks from the roller.
Let it dry well
Let the cabinet dry for at least 24 hours. Make sure there is good ventilation and a temperature of around 20 °C (68 °F).
Apply a second coat
Apply a second coat for a better result.
Maintaining the cabinet
Now that the cabinet has been completely refurbished, you want to keep it looking good for as long as possible. That means maintaining the cabinet as well as you can. You can clean the cabinet with a regular cleaning spray and a damp cloth. However, a regular cleaning spray can slowly dry out and break down the finish. Want to prevent that? Then we recommend using Osmo Spray-Cleaner. Osmo's cleaning spray contains a small share of wax, which nourishes the finish while you clean, so it lasts longer.
Frequently asked questions
This tutorial belongs to
What you need for this tutorial;
We're happy to help
Looking for DIY advice or have a technical question?