Staining wood
This page explains what staining wood is, why it is important and how Osmo Natuurlijke Olie-Beits protects the wood against the weather while keeping its structure visible. It also covers the benefits, the available colors and the uses for different wood species, plus tips for restaining and maintenance.

What you need for this tutorial;
Staining wood? Before we explain how to stain wood, it is important to know what stain is and why wood needs to be treated at all. This article also covers which wood stain colors are available and whether you can restain wood that has already been stained.
Benefits of Natuurlijke Olie-Beits
- Primer and topcoat in one
- UV-resistant, weather-resistant and water-repellent
- High coverage: 1 L treats 26 m²
- Based on natural ingredients
Wood stain colors
Natuurlijke Olie-Beits is available in many colors, and there is also a colorless matte version: Natuurlijke Olie-Beits 701. There are 19 different colors to stain the wood with. A treatment with this exterior stain gives a non-opaque effect: the structure and grain of the wood remain visible, so the beautiful lines and texture of the wood keep showing through. Not sure which color you want to apply? No problem, we stock 5 ml test packs of every color.
Staining wood black
Black stained fences, sheds and other wooden surfaces are on trend. To stain wood black, you can use Natuurlijke Olie-Beits 712 Ebbenhout. This color is close to black. To make the surface truly black, we stock Beits RAL 9005. When this color is applied with a roller or brush, it gives an opaque finish. When it is applied by buffing, it gives a more transparent finish. Beits RAL 9005 is often applied to Swedish rebate boards. These boards are also known as shiplap or weatherboards and are widely used for fences and facades.
Osmo Natuurlijke Olie-Beits colors
Videos: Staining wood
In these videos you will see how to stain the wood with Natuurlijke Olie-Beits and how to stain a table or furniture.

Schutting beitsen: hoe beits ik een schutting?

Tafel beitsen: hoe beits je een houten meubel?
Step-by-step plan: staining wood
Choose the right stain and color
Decide which color and look you want and choose Osmo Natuurlijke Olie-Beits. If in doubt, use a test pack to check the color and adhesion.
Clean the wood
Clean the surface thoroughly so that dirt and graying do not get trapped under the treatment. Use Osmo Power-Gel Houtontgrijzer for this and then let the wood dry completely.
Sand if necessary
If there is an old layer of paint, varnish or stubborn stain, sand the wood back to bare wood first. Work in stages and make the surface dust-free before you start.
Stir the stain well
Stir the can of Osmo Natuurlijke Olie-Beits thoroughly so that the pigments and oils are evenly distributed.
Apply the first coat
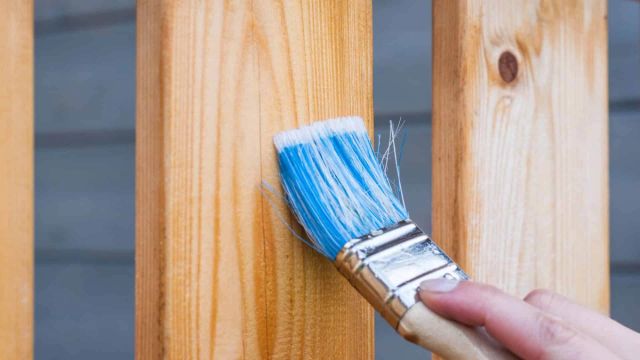
Apply a thin coat with a brush or roller system and always work in the direction of the wood grain.
Let it dry
Let the stain dry properly according to the drying time on the packaging and make sure there is enough ventilation.
Apply a second coat
For optimal protection, apply a second thin coat in the same way as the first.
Varnishing or staining wood?
What is stain?
Stain is a wood treatment that protects the wood from within. It gives the surface protection against rain, UV rays, drying out and dirt. Staining the wood therefore lets you enjoy the surface for longer.
Staining the wood creates a moisture-regulating surface, which means the wood can keep moving after treatment. The wood is protected, yet it can keep breathing and moisture can escape from the surface. Varnish and paint create a sealing surface: these products form a layer on top of the surface, whereas stain really penetrates the surface and protects it from within. In addition, Osmo Natuurlijke Olie-Beits can be touched up locally without having to sand the surface.
Why stain wood?
To enjoy a wooden surface for longer, it is important to stain the wood. If you do not, the wood will lose its beautiful color and turn gray. There is also a good chance that the surface will start to rot due to moisture and rain.
Staining impregnated wood
Impregnated wood is wood that has been treated with a preservative to protect it for a long time against things like algae and fungi. Impregnated wood also needs to be stained. The wood is already impregnated, but without stain it will still last less long than with a treatment of Natuurlijke Olie-Beits. Staining impregnated wood also gives it a beautiful look of your choice.
Staining Douglas fir
All wood species suitable for outdoor use can be treated with Osmo stain. Think of Douglas fir, bankirai, larch, garapa and many more. All of these species can be treated with any Osmo stain color.
Restaining stained wood
Wood that has been treated with Osmo stain can be treated again without having to sand it. Stained wood that was not treated with Osmo can also be treated with Osmo stain, but always do a test first to check that the adhesion is good. Before you stain the surface, it is important to clean the wood. Otherwise all the dirt stays trapped under the stain, which gives a less attractive result. The surface can be cleaned with Power-Gel Houtontgrijzer.
Supplies for staining wood
Frequently asked questions about staining wood
This tutorial belongs to
What you need for this tutorial;
We're happy to help
Looking for DIY advice or have a technical question?